domenica 10 luglio 2011

3 Bigliettino con Copic per ARTarE- Mese di Luglio

Eccoci qui arrivati al nostro consueto appuntamento con ARTarE.
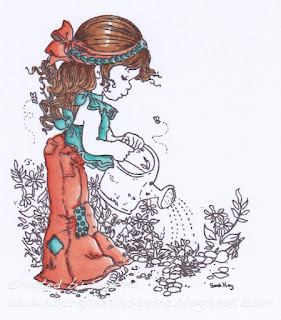
Questa volta per il mio progetto ho utilizzato un bellissimo timbro di Sarah Kay , e precisamente Bernadette Fiori, che naturalmente trovate nello shop. 
We arrived at our usual appointment with ARTarE.
This time, for my project, I used a beautiful stamp by Sarah Kay, "Bernadette Flowers" who you can find in the shop.


Per la mia card ho utilizzato una bellissima carta dai colori estivi e seguendone le  geometrie ho costruito il progetto inserendo qualche abbellimento in 3D e un nastro per ingentilire il tutto.
After coloring the stamp, I used paper with beautiful summer colors. I followed these beautiful geometry to build the project by inserting some 3D embellishments and a ribbon .


Partiamo con la consueta timbrata su cartoncino e iniziamo a colorare il personaggio come oramai avrete imparato, rispettando la regola della luce e ombra.Ecco il tutorial passo-passo.
Let's start with the usual stamped on cardstock and begin to paintyou have learned by now !! (respecting the rule of light and shadow).


Grazie per la visita


Pin It!

domenica 3 luglio 2011

20 Cornice Alterata (..molto alterata !!)

Dopo aver partecipato al meeting ASI di Torino e lasciandomi anche ispirare da Mery e le sue creazioni, ho alterato la mia prima cornice.
Questa cornice è diventata "molto alterata" principalmente perchè saranno 6 anni circa che giaceva nascosta in un angolino senza mai essere presa in considerazione. A dire la verità l'avevo acquistata quando ero nel periodo-decoupage, ma poi non ne avevo mai fatto niente.
La considero anche molto alterata per le sue dimensioni, infatti è una cornice quadrupla che mi ha dato un bel pò da fare.
After  the ASI meeting in Turin and also be inspired by Mery and his creations, I altered my first frame.
This frame has become "very upset" because I bought it six years ago, but I haven't use it !!  Actually I had bought it when I was in the decoupage-age , but then I had not done anything.

I consider also very affected by the size, it is a quad-frame that gave me quite a lot to do.


Passiamo ora al progetto vero e proprio.La cornice di base era di legno grezzo di colore molto chiaro (tipo betulla ), l'ho colorata con i colori acrilici:metà marrone scuro e metà senape.
L'ho poi trattata (alla maniera decoupage, appunto..)con un'ulteriore mano di acrilico avorio ed invecchiata in modo shabby-vintage
The basic frame of raw wood was very light color , I painted with acrylic colors: half and half dark brown and mustard.
I then treated (in decoupage style ) with an extra coat of acrylic ivory and aged in a shabby-vintage.


A questo punto, ho iniziato ad alterare la cornice con timbri, carte, fustelle della Big Shot, brads, abbellimenti di Tim Holtz, e tanta fantasia e tanta, tanta pazienza !!
Per riprendere i colori di base della cornice e non avendo ancora deciso quali foto sarebbero state scelte, ho utilizzato colori neutri che potessero essere abbinabili con tutto.

At this point, I started to alter the frame with stamps, papers, punches ,brads, embellishments from Tim Holtz, and lot of imagination and a lot of patience!Returning to the basic color of the frame and not yet decided which photos were chosen, I use neutral colors that could be combined with everything.


Per la cronaca la prima foto è quella del nostro recentissimo viaggio a Praga:Let's start !The first photo is from our recent trip to Prague:
dettagli della prima cornice:


Seconda cornice:nel bush del Masai MaraSecond frame:into the Masai-Mara bush.


Terza cornice:Cape-Point in Sudafrica(con queste farfalle..ragazze che lavoro titanico!!)Third frame: Cape-Point South Africa (the butterflies..a lot of work!!)


Ultima cornice: Parco Nazionale dello Yellowstone- USALast frame:Yellowstone National Park-USA 


Grazie per la pazienza e per la visita !!Thanks for patience and for visiting


Pin It!

mercoledì 29 giugno 2011

128 Blog Candy !!!


Dopo essermi documentata sul funzionamento del Blog Candy, anche io voglio fare questa esperienza !!(Chiedo scusa già da ora se dovessi commettere qualche errore "da principiante"..)
Non è nè il mio compleanno, nè il blog-compleanno, ma è semplicemente un pensiero carino che voglio rivolgere a tutte le mie nuove amiche della rete.
 I  want to have the blog-candy experience! (I apologize right now if I were making a mistake "beginner" ..)
It  isn't my birthday, or the blog-birthday, but is simply a nice gift I want to address to all my new friends in the network.
Le regole da seguire sono semplici (cioè le solite):

  • diventa follower( naturalmente se non lo sei già..) 
  • posta il mio Blog Candy sulla tua sidebar con il link di collegamento a questo post
  • Lascia il tuo nome e indirizzo del tuo blog a Mr. Linky qua sotto, e se vorrete lasciare anche un piccolo commento mi farebbe molto felice !(Per favore una volta sola..ogni tanto Mr. Linky si incanta..)
Considerando che ad Agosto sono in ferie, e quindi non potrò postare il nome vincitore e spedire il pacchetto, rimando di qualche giorno l'estrazione che avverrà tramite RANDOM.ORG.
Il Candy rimane quindi aperto fino al 3 Settembre ore 23.59 (ora italiana). 

To enter my candy the usual rules apply:
  • You must be a follower of my blog
  • Post about my candy on your blog and/or put it in your sidebar with the following link back to me.
  • Enter your name and blog link to Mr. Linky below, and if you want a little comment pleased me very much.(Please ,only enter once).

In August I will be on vacation, I could not able to  post the name of the winner.

I will take a few days to make the extraction that will be done via RANDOM.ORG.


This candy will remain open until the 3th September 23.59 (Rome time).


Mi permetto di farvi notare "il pezzo forte " del Candy.
E' quell'attrezzo grigio che sembra una pistola, in realtà è un  dispenser appositamente studiato per l'applicazione del nastro biadesivo sottile.
Chi di voi lo conosce e lo utilizza già sa perfettamente che una volta che ci si è abituati ..non se può più fare a meno perchè è veramente comodo!!
Naturalmente ci sono anche 6 nastri biadesivi (in 2 diverse altezze) per le ricariche.
Allow me to point out "the highlight" of Candy.
It looks like a gun but it a dispenser designed specifically for the application of thin double sided tape.
Those of you who know him and uses it already knows that once you are used to .. not whether it can do without because it's really handy!
Of course, there are 6 double-sided tapes (in 2 different heights) for refills.


Grazie per la visita 
Thanks for the visit

Pin It!